

After a bit of poking around, test fitting, drilling out some pop-rivets, cutting, notching, more drilling and pop-riveting, here's a better look at the final dimensions and the beginnings of the interior framing.
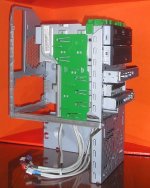
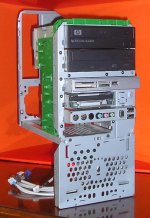
After I noodle out a way to attach the front bezel without the clips in the lower section of the frontspiece and the cut down or replace the locking jaw mechanism at the top, I can cut and bend the remaining chassis waste to fit within the confines of the final inner dimensions.
Gotta find a small PSU amongst the stuff or source one that's shallow enough to work well within the cubic available.
If you look closely, you can see where I've cut away some of the wast at the back end of the other side . . .
. . . more pics to follow.
After I noodle out a way to attach the front bezel without the clips in the lower section of the frontspiece and the cut down or replace the locking jaw mechanism at the top, I can cut and bend the remaining chassis waste to fit within the confines of the final inner dimensions.
Gotta find a small PSU amongst the stuff or source one that's shallow enough to work well within the cubic available.
If you look closely, you can see where I've cut away some of the wast at the back end of the other side . . .
. . . more pics to follow.