

Thread
My case for the FloppyEmu!
Can't stand his voice…. just absolutely hate it. I just get the urge to hit em with a shovel!
No cracks about the IIgs floppy emu, I don't see anyone else willing to do testing.
I think that ic on there is quite crafty.
you wanna see some crap work… i should rip open one of these Chinese android tablets…
double sided foam tape/ regular tape…
Soldered idc cable connecting pcb's. etc etc very shoddy work…
edit: saw the video… well wow… haha.
i personally never seen patch work that extensive, maybe it was a prototype
All though , my IIgs / LCIII / PB100 has some pretty extensive patch work from apple!
if he was really good, he would have fired that thing up made it work.
i think that microswitch is like the macintosh portable, normally the memory is kept by battery, when you remove the battery cover it probably switches over to a 3v coin cell some where, so it retains the data saved, while changing AAA batteries.
No cracks about the IIgs floppy emu, I don't see anyone else willing to do testing.
I think that ic on there is quite crafty.
you wanna see some crap work… i should rip open one of these Chinese android tablets…
double sided foam tape/ regular tape…
Soldered idc cable connecting pcb's. etc etc very shoddy work…
edit: saw the video… well wow… haha.
i personally never seen patch work that extensive, maybe it was a prototype
All though , my IIgs / LCIII / PB100 has some pretty extensive patch work from apple!
if he was really good, he would have fired that thing up made it work.
i think that microswitch is like the macintosh portable, normally the memory is kept by battery, when you remove the battery cover it probably switches over to a 3v coin cell some where, so it retains the data saved, while changing AAA batteries.
He is a pretty good electronics engineer, but I find his knowledge is mostly derived from the mathematics aspect. Which most engineers are taught that way, and thats not a bad thing. Im my case, its ass-backwards as I learned engineering from repair, and overall experience in general, and know very little on the math side of it, which you can imagine doesnt make it easy for me on programming.
I guess we both have our advantages, and disadvantages. For me, when I layout a PCB I know where to place components to maximize the life of the board, from a repair aspect I pretty much learned the cause and effect of that scenario. But if i had to engineer a circuit totally from math, I could never do it, however I know generally how most circuitry works, so i can pretty much design it anyway, and fine-tune the details/values by using math from a datasheet, if necessary.
Engineers that come from a mathematics background (as most engineers do), typically dont think about service or the next guy that has to work on it. I find this very often with cars, and most electronics in general lol. Or arnt designed for service period. Since I came from a very different background, I design things to be serviced. Even on some of the industrial electronics I have worked on arnt designed for easy access or service either. And the PCBs are routed out very poorly where heat will dry out capacitors and result in early failure.
I guess we both have our advantages, and disadvantages. For me, when I layout a PCB I know where to place components to maximize the life of the board, from a repair aspect I pretty much learned the cause and effect of that scenario. But if i had to engineer a circuit totally from math, I could never do it, however I know generally how most circuitry works, so i can pretty much design it anyway, and fine-tune the details/values by using math from a datasheet, if necessary.
Engineers that come from a mathematics background (as most engineers do), typically dont think about service or the next guy that has to work on it. I find this very often with cars, and most electronics in general lol. Or arnt designed for service period. Since I came from a very different background, I design things to be serviced. Even on some of the industrial electronics I have worked on arnt designed for easy access or service either. And the PCBs are routed out very poorly where heat will dry out capacitors and result in early failure.
Ya lol.
Just like that guy that thinks he needs 4 years of college, a $10,000 snap on tool box/kit
And you show up with a $19.99 stanly tool kit and a $2.99 heli coil kit to fix the spark plug that he striped out lol
I love the guy. Hate his voice. It makes me wanna puke, really, his squeaky high voice is more then I can handle.
Techknight just needs more time, at least that's what it seems to me, I think your work
Is always keeping you extra busy.
Just like that guy that thinks he needs 4 years of college, a $10,000 snap on tool box/kit
And you show up with a $19.99 stanly tool kit and a $2.99 heli coil kit to fix the spark plug that he striped out lol
I love the guy. Hate his voice. It makes me wanna puke, really, his squeaky high voice is more then I can handle.
Techknight just needs more time, at least that's what it seems to me, I think your work
Is always keeping you extra busy.
Yea it does keep me extra busy, because not only is repair my day job, I also have a 2nd job doing contract electronics engineering and repair for Major Display LLC, which was former Santech Inc, who designed and manufactured electronic scoreboards.
Trying to finish up the control console programming and design that will go to Apopka high school in florida, their new baseball scoreboard. My vintage mac nutness is starting to obstruct the design of my programming. LOL
Not to mention, I am in the process of starting to pack up and move.
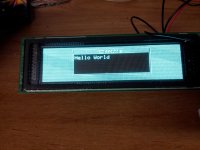
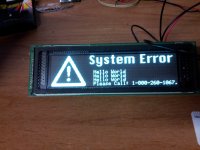
Trying to finish up the control console programming and design that will go to Apopka high school in florida, their new baseball scoreboard. My vintage mac nutness is starting to obstruct the design of my programming. LOL
Not to mention, I am in the process of starting to pack up and move.
Thought I'd post pictures of version 2.0 that I printed, though I've already started changes on it for version 3.0 to allow for the external ribbon cable.
As you can see for the SD card slot, I got the measurements wrong. I'll have to nudge it over. But not too shabby! I think I also need to add clips on the sides somewhere. Or maybe screw holes.
[attachment=2]1.JPG[/attachment]
[attachment=1]2.JPG[/attachment]
[attachment=0]3.JPG[/attachment]
As you can see for the SD card slot, I got the measurements wrong. I'll have to nudge it over. But not too shabby! I think I also need to add clips on the sides somewhere. Or maybe screw holes.
[attachment=2]1.JPG[/attachment]
[attachment=1]2.JPG[/attachment]
[attachment=0]3.JPG[/attachment]
Wow that's like black magic . Good job
. Good job
Put me on the "interested in buying one" list.
How will you handle the buttons?
How will you handle the buttons?
I'm just going to print some round buttons that have a stick going down to the real buttons. I may make the button holes bigger, though, in version 3.0. I'm going to experiment with making some clips, as well, to clip the board down and the case. Right now both are connected via friction, which works fine, except if you were to drop it everything would go flying everywhere. Plus, the friction parts would ware out after a while, and it's stop holding together. Best to clip it down.
Very cool! My wife got me a Printrbot for my birthday. I'd love to experiment with this!
Once I'm done, I'll upload it to Thingiverse and you can have at it.
WOW just 299.00 what a deal!
http://printrbot.com/product-category/3d-printers/
[attachment=0]Screen shot 2014-01-08 at 2.11.29 PM.jpg[/attachment]
i had no idea they were this affordable!
http://printrbot.com/product-category/3d-printers/
[attachment=0]Screen shot 2014-01-08 at 2.11.29 PM.jpg[/attachment]
i had no idea they were this affordable!
:O
back on track: Very nice, oP! I've seen cases where the buttons/extenders are integrated into the injection molded part, I'll be on the lookout for one. I'm assuming that you're printing this face down, so it should be a piece of cake to do the springy/buttony/thingies.
Rapid prototyping makes it easy to do low-production parts which can't be done in the real world of injection molding, no release angle/access/multi-part tooling requirements. [}] ]'>
back on track: Very nice, oP! I've seen cases where the buttons/extenders are integrated into the injection molded part, I'll be on the lookout for one. I'm assuming that you're printing this face down, so it should be a piece of cake to do the springy/buttony/thingies.
Rapid prototyping makes it easy to do low-production parts which can't be done in the real world of injection molding, no release angle/access/multi-part tooling requirements. [}
] ]'>
trash you need a 3d printer!!!!
[attachment=0]picture-27610.gif[/attachment]
[attachment=0]picture-27610.gif[/attachment]
OK, here's 3.0. I changed the size a bit. This is now approximately 1/2 scale of an Apple 3.5" floppy drive.
I just realized as I'm writing this that I forgot the door for the cable extender, but it's now too late in the day. I'll fiddle with it tomorrow morning. Anyway, you'll get the idea. I added clips to keep the board in place, and some dimple thingies so the case will latch shut. You just press gently on the inseam to release, and the top case will pop off. Theoretically. I'll try printing it out tomorrow and give it a whirl. The large squares on the bottom are the same size as the inset squares on a floppy. So any of those classic Apple rectangle feets will stick in there.
[attachment=2]case.png[/attachment]
[attachment=1]clips.png[/attachment]
[attachment=0]buttons.png[/attachment]
I just realized as I'm writing this that I forgot the door for the cable extender, but it's now too late in the day. I'll fiddle with it tomorrow morning. Anyway, you'll get the idea. I added clips to keep the board in place, and some dimple thingies so the case will latch shut. You just press gently on the inseam to release, and the top case will pop off. Theoretically. I'll try printing it out tomorrow and give it a whirl. The large squares on the bottom are the same size as the inset squares on a floppy. So any of those classic Apple rectangle feets will stick in there.
[attachment=2]case.png[/attachment]
[attachment=1]clips.png[/attachment]
[attachment=0]buttons.png[/attachment]
LOVE IT!
My case is on indefinite hold until our 3D printer fixed. It won't print for longer than 10 minutes.
Here're the case files:
http://olepigeon.trolans.net/case.zip
If anyone has a 3D printer, give it a whirl. I'm anxious to know if the bottom part of the case lines up and clicks together with the top. I'm so close to completing this, it's absolutely frustrating that the printer has decided to stop now. Probably even more frustrating for the tech teacher who has grades do at the end of the week, and no 3D printer for the kids to use.
Argh!

While the 3D printer is down, I'll be working on the spacers for the 2.5" drives. Unfortunately, I won't be able to test them until the printer is fixed. Sigh.
http://olepigeon.trolans.net/case.zip
If anyone has a 3D printer, give it a whirl. I'm anxious to know if the bottom part of the case lines up and clicks together with the top. I'm so close to completing this, it's absolutely frustrating that the printer has decided to stop now. Probably even more frustrating for the tech teacher who has grades do at the end of the week, and no 3D printer for the kids to use.
Argh!
While the 3D printer is down, I'll be working on the spacers for the 2.5" drives. Unfortunately, I won't be able to test them until the printer is fixed. Sigh.
Decided to call MakerBot instead of wait for an email (which, apparently, takes 24 hours.) They determined by the SN that we have an old plunger based extruder and are sending us a brand new spring based extruder. The old one can't maintain the tension to move the filament through, so it'll just stop and create a divot on the filament. They're sending us a new spring based extruder that should solve that problem.
Huzzah! Should be back and printing by the end of the week.
Huzzah! Should be back and printing by the end of the week.
that is good news!
I am just sitting here thinking of all the possibilities, Uses for a 3d printer!
what temperature does the plastic melt at?
i wonder if one could make the same sort of thing but with aluminum?
I am just sitting here thinking of all the possibilities, Uses for a 3d printer!
what temperature does the plastic melt at?
i wonder if one could make the same sort of thing but with aluminum?
If you use a powder based printer instead of filament, you can print using all sorts of different materials from plastic, to metal, to ceramic.
Just installed the new extruder. Giving it a go by printing the bottom half of the case. *crosses fingers*
[ ] ]'>
] ]'>
] ]'>
First print failed, but I forgot I had custom settings for the printer still. Reset it to default, giving another try.
Sigh. Still failing.  Back to support.
Back to support.
can you get a pie fan to cool the electronics… then send you a new power board? now that you know its not the extruder.
Looks to be a vibration issue. As it moves the build plate, it starts to wobble and jitter, especially when the print head is moving a lot.
The forums suggest putting felt pads under neath the build plate. I'll see how that goes.
The forums suggest putting felt pads under neath the build plate. I'll see how that goes.
What exactly is going wrong when you try to print the case? Sounds very frustrating.
I just unpacked my Printrbot Simple and printed the 5mm calibration cube successfully. The print quality seems mostly OK, though there are a couple of spots where it messed up and left little deformities or stray bits of plastic. Unfortunately the max print area of the Printrbot Simple is a few millimeters too small to print your case model.
I just unpacked my Printrbot Simple and printed the 5mm calibration cube successfully. The print quality seems mostly OK, though there are a couple of spots where it messed up and left little deformities or stray bits of plastic. Unfortunately the max print area of the Printrbot Simple is a few millimeters too small to print your case model.
As it gets higher and higher on the build, the part where it's trying to print is moving more and more as the build plate jitters. It then just fails because it's moving so much, the plastic can't adhere to itself. It starts off printing fine, then as it gets taller, it gets brittle and eventually doesn't print anything and just leaves a blob of plastic spaghetti.
It's cool having a two part case prototyped, but I think you might better to switch to a six part prototype of your prototype case before real frustration builds to the point of taking psychotic retributions upon school property. Been there, done that, but rarely upon the property of others. [}] ]'>
Maybe try doing dovetail joinery for the carcass sides held together with snap-on lid and bottom. :?:
@BMOW: some creative wood joinery would allow you to print a pair of ship-lapped parts that slide together, clicking into place with a latct for easy case removal. The overlapped sections bring the case down to dimensions that you can print.
] ]'>Maybe try doing dovetail joinery for the carcass sides held together with snap-on lid and bottom. :?:
@BMOW: some creative wood joinery would allow you to print a pair of ship-lapped parts that slide together, clicking into place with a latct for easy case removal. The overlapped sections bring the case down to dimensions that you can print.
So we're ordering a few more upgrades for our 3D printer. Talked to someone at a hackerspace, and all of their Replicators are having the same problem we are. They'll get about 50% up on a build and it starts to fall apart from vibration.
So we're ordering some aluminum arm upgrades that should help. The same company also makes a fancy heated build plate, so we might buy that, too.
In the meantime, I'm fiddling with my HDD adapter and riser. They're small and flat, so I should be able to print them even with the vibrations.
So we're ordering some aluminum arm upgrades that should help. The same company also makes a fancy heated build plate, so we might buy that, too.
In the meantime, I'm fiddling with my HDD adapter and riser. They're small and flat, so I should be able to print them even with the vibrations.