

Thread
Designing a portable RAM card
I decided to spin this off from my other thread. There seems to be some interest in this, so i decided to move on with the project.
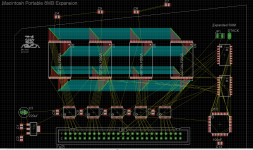
Here is my progress so far:
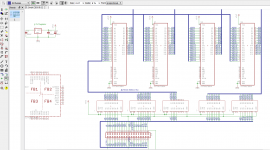
Still alot to go, but so far so good. Got the busses done, just need to get all the signal/enable/CPLD lines ran.
Turns out the apple guide to the family hardware is the correct one. the developer note is incorrect in pin numbering on the socket but the number to signal table figure appears right, and the designing cards and drivers for macintosh is completely wrong. pins and all.
Here is my progress so far:
Still alot to go, but so far so good. Got the busses done, just need to get all the signal/enable/CPLD lines ran.
Turns out the apple guide to the family hardware is the correct one. the developer note is incorrect in pin numbering on the socket but the number to signal table figure appears right, and the designing cards and drivers for macintosh is completely wrong. pins and all.
Gotta love it, supposed "reliable" sources of information turn out to be anything but.
Yea, i bet that caused some havok for RAM card makers back in the day. lol.
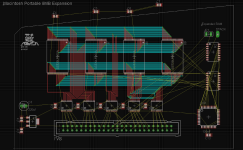
Anyway, more progress. Pretty much complete to operate as stock.
Just have to add a couple jumpers, extra connection points for the DTACK and /AS line for full 9MB extended addressing. Then of course i need to add the decoupling caps, and route the board.
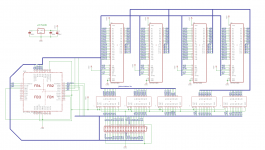
Anyway, more progress. Pretty much complete to operate as stock.
Just have to add a couple jumpers, extra connection points for the DTACK and /AS line for full 9MB extended addressing. Then of course i need to add the decoupling caps, and route the board.
No thoughts? hmm... Guess its a monologue
Anyway, board routing time!
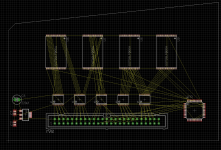
Anyway, board routing time!
one word for you sir, awesome!
So again this will work with the 5120 or 5126?
So again this will work with the 5120 or 5126?
both. In theory, it should be universal.
the difference between the two models, the Backlit has a Refresh line, whilst the original does not. And the backlit /AS becomes /RAMCS, meaning its stuck at a 5MB ceiling, which is why I will have a pin to allow a wire to branch off to the next slot to pick up /AS for the full 9MB.
I will also have a DTACK pin as well, that will connect to the CPU DTACK line to allow the remaining 4MB of address space to be mapped to RAM without throwing bus errors.
In a nutshell, if you want all 9MB, you will have 2 plug-in wires coming of the board going to the ROM slot. or maybe PDS. If you dont want wires, your stuck at 5MB.
the difference between the two models, the Backlit has a Refresh line, whilst the original does not. And the backlit /AS becomes /RAMCS, meaning its stuck at a 5MB ceiling, which is why I will have a pin to allow a wire to branch off to the next slot to pick up /AS for the full 9MB.
I will also have a DTACK pin as well, that will connect to the CPU DTACK line to allow the remaining 4MB of address space to be mapped to RAM without throwing bus errors.
In a nutshell, if you want all 9MB, you will have 2 plug-in wires coming of the board going to the ROM slot. or maybe PDS. If you dont want wires, your stuck at 5MB.
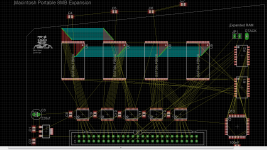
took 3 hours just to get this far. Routing is FUN!!! Not... its anything BUT that....
Not a monologue as much as a rapt audience waiting for each piece to appear as you make them.
I'm a liberal arts major. I could provide some useful input on how pretty those pictures are, if that helps. 
speaking of pretty pictures.Staring at those trace lines and routing new ones after several hours, its screwing with my vision. 
Well my 5120 ram causes chimes in my 5126 and vise versa.
If your design will work in both is the incorrect information why the originals don't?
If your design will work in both is the incorrect information why the originals don't?
Going to call it quits for today. Starting to get a headache. However, All the data/address lines are ran between TSOPs.
because as I mentioned before, two lines are switched and changed between the two models. the Backlit model has a Refresh signal, portable model does not.
Here is an apple doc explaining why:
http://24.52.155.15/dissport/Port_Dev_Blit.pdf
My setup, it should not matter.
Here is an apple doc explaining why:
http://24.52.155.15/dissport/Port_Dev_Blit.pdf
My setup, it should not matter.
Couldnt help myself, once I am on a roll, I tend to keep going. After taking a break, Made more progress...
I'm the same way.
lol you beast.
little bit more routing done before I hit the sack.
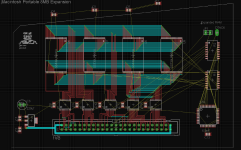
You're doing great. We'll jump in if you screw up.
Plus, I don't access the internet much on the weekends, when you're likely to be making progress on this.
Well if I screw up, its going to be how I am using the CPLD and its assigned pins. This my first time ever doing a custom CPLD thingy.
More progress. its all routed! Just have to draw the ground planes and clean up those airwires.
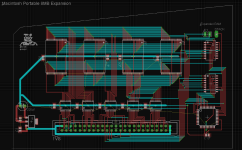
Ground planes are done. In the process of Via stitching the layers.
All done. ground planes are routed, VIA stitching is done, and then the JTAG header installed. Along with some diagnostic LEDs.
Now is finding a PCB service that can run that board, the traces and vias are kinda tight.
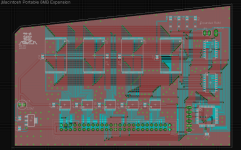
Now is finding a PCB service that can run that board, the traces and vias are kinda tight.
What color do you think I should run the boards with?
I like Blue PCB's best, White and Black ones also look pretty good too
How about green? It would match the Portable logic board.
What ever is cheapest, I suppose.
c
What ever is cheapest, I suppose.
c
Green is always the cheapest
I think that most services will do 6 mil traces and spacing as standard service these days.
It looks great. I'm looking forward to reading about the actual product.
It looks great. I'm looking forward to reading about the actual product.
hot pink
Lolol.. ur funny
Purple. A nice professional yet slightly stand-out type shade. It is a little flare of colour, yet nice and dark to maintain a clean look. I am not sure how to describe it better tbh.
Orange is good for something nice and bright though.
Orange is good for something nice and bright though.